
Complete Preservation were asked to inspect a property in Bristol that had dampness issues. There was visible staining on the ground floor, and first floor of the flank wall, and also around the window reveals on the front ground floor window.
A damp proofer had recently been instructed to carry out some damp proof plastering works, unfortunately the repairs carried out didn’t fix the issues, and problems persisted.
Our initial phone consoltation with the client revealed a number of things the previous “surveyor” hadn’t checked, on the free survey.
- There was no aerial survey of the chimney!
- There was no inspection of the damp proof course on the internal cavity wall!
- There was no salt analysis!
- There was no moisture analysis!
- No real external defects noted, or clarified to be ok!
Defects found on our survey
The aerial survey revealed cracking to the crown of the chimney, this was recently carried out as they recently had a new log burner fitted.

Close up of cracking

Worn pointing and damaged bricks

Circular holes indicative of retrofit cavity wall insulation, a boroscope inspection confirmed this. A small amount of insulation was removed which was wet.
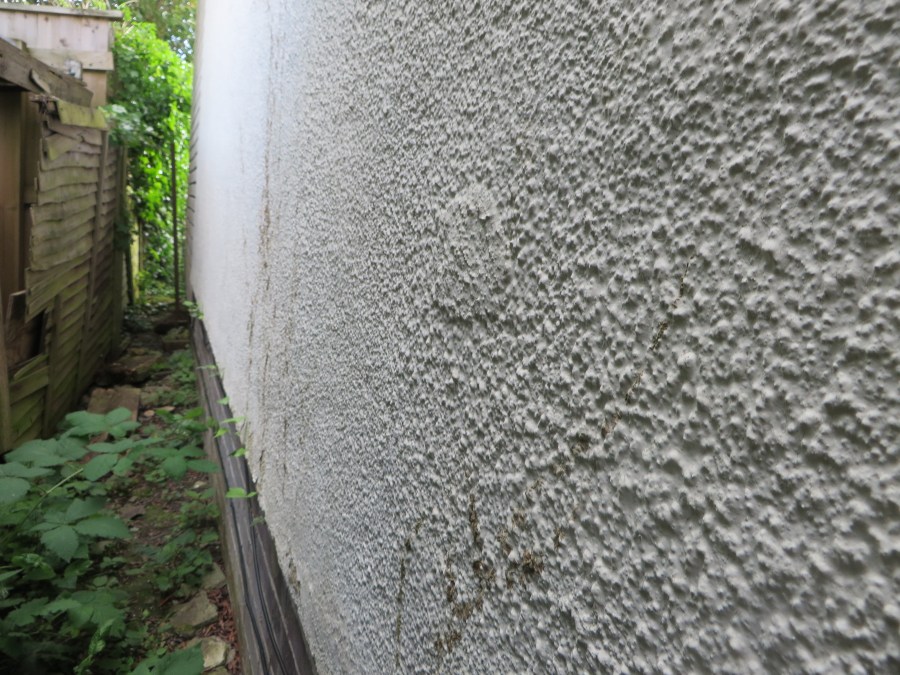
Hollow and cracked render.

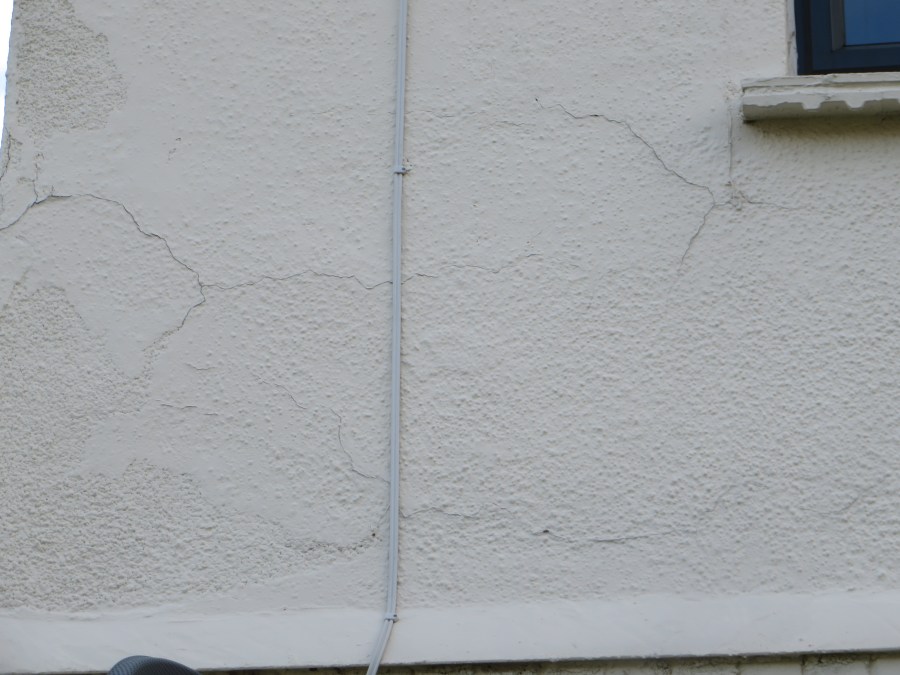
Significant cracking in render and external decoration.
The problem area is facing South West, this takes the weather.

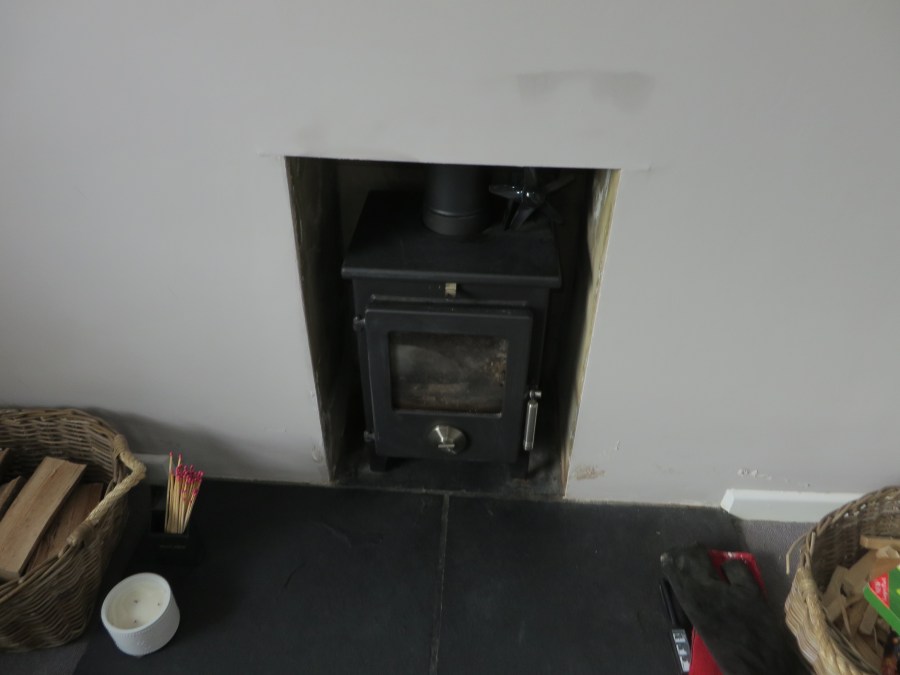
The hearth was in direct contact to the earth of the sub floor void, this was viewed with a boroscope in the small circular hole in the floorboard, with no form of damp proofing (membrane). The physical damp proof course was noted to below the internal suspended timber floorboards (not a problem though), it was clear with the boroscope inspection that the hearth was bridging this. Bonding plaster was touching the hearth which was also damp, this was plastered before the slate tiles were fitted by the installation company (this causes bridging of the damp proof course).

Rusting angle beads, blistered paint, efflorescent salts – indicative of a long term problem.
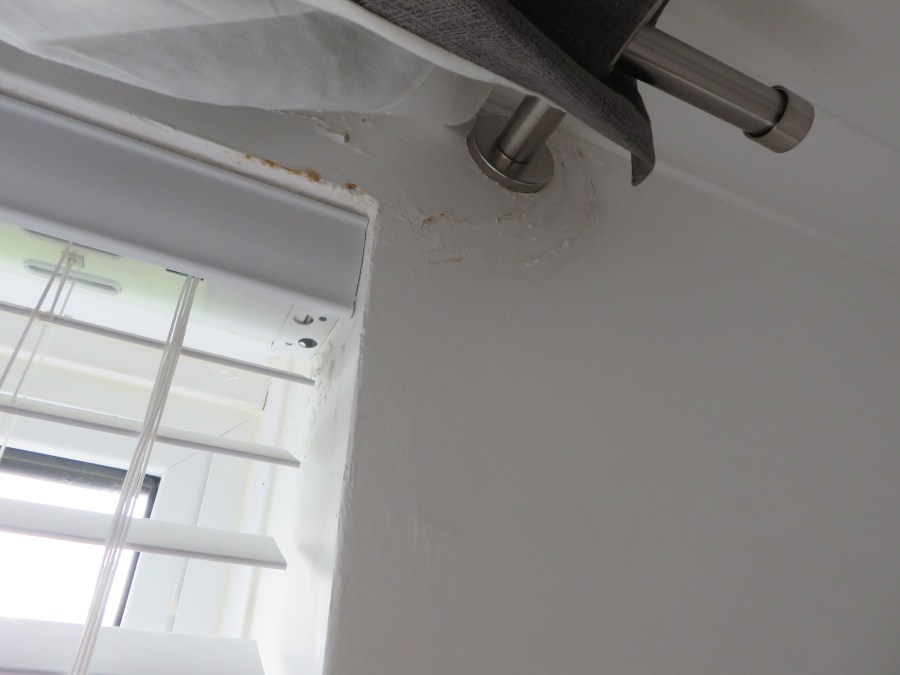
Staining just below coving on ground floor

High readings in the timber adjacent the chimney in the roof.

Staining, blistered paint. I was also told damp patches appear across the flank wall during heavy rain.
High readings were noted on the first floor in scan mode with a damp meter, no samples were taken as this was recently decorated. My thoughts were if this is a penetrating damp issue, perhaps we can dry down the wall with removal of the damp insulation and save any decoration costs.
Thermal imaging using the Flir T600 didn’t reveal any real obvious defects with regard to a point of penetrating damp ingress. What we could see is cold bridging from the wall ties in the top right hand side of the thermal images because of the wet insulation.


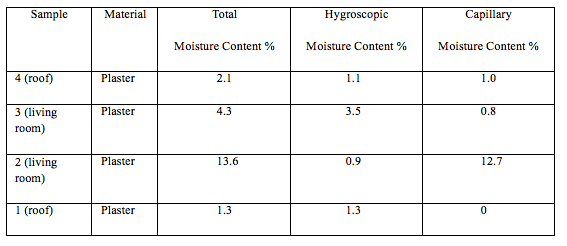
Table of results following the laboratory methodology in Bre Digest 245. This shows there was a very small amount of capillary moisture from the chimney in the roof, this was after a long dry spell. 12.7% capillary moisture content was noted above the physical damp proof course indicative of penetrating dampness issues, hygroscopic salts were also noted around the chimney area from the long term burning of fossil fuels. Hygroscopic salt analysis showed high chloride to nitrate, which is what I would expect around chimneys.
Repairs
Lovely new crown, new pointing along with a coating of a Stormdry waterproofer.

Internal re-plastering carried out with a salt inhibitor / waterproofer to contain any residual moisture until the wall dries down. Liquid membrane applied to hearth, with complete continuity with the existing physical damp proof course.

Sub floor ventilation was increased along with the original vents being cleaned out as these were blocked with the cavity wall insulation.
So the big question is, who’s fault is it?………There is so much negative press with cavity wall insulation at the moment, some of which is deserved where the insulation was fitted in unsuitable properties, or where there were existing defects.
However I have seen many properties where the insulation isn’t to blame. If this property had no external defects perhaps there would have been no issues regarding ingress, but it is not unusual that all properties are well maintained as to be expected to ensure there are no issues with regard to retrofit insulation.
In my opinion the installer should have sleeved the existing air bricks and ensured the cavity was clear of any debris, unfortunately some of the time and in depth survey isn’t carried out prior to installation.
We instructed a company called Vac-xtract to remove the insulation material using their specialist equipment they have. We have worked with this Company on a number of projects and found the service they is offer is exceptional. After all the insulation is removed they carry out a video survey to show all debris are removed along with the insulation…….complete peace of mind for the customer.
If you have problems with damp / mould, possibly because of damp cavity wall insulation it is best to get a professional survey. We offer surveys for all types of dampness issues, along with repairs and extraction if it is deemed necessary.
Contact us on 01225 769215 or enquiries@completepreservaton.co.uk
Click on this link to read about soaking wet cavity wall insulation, this is the worse one I have ever seen.

Leave a comment